The Yurt Part 2
In The Yurt Part 1 we left off where the small yurt’s support posts were completed. This installment continues with that effort.
The next construction step is to cut the support beams for the yurt’s floor. These are made using pressure treated1 4x6 beams. The below image shows the beams in place but not yet secured to the poles with steel plates.
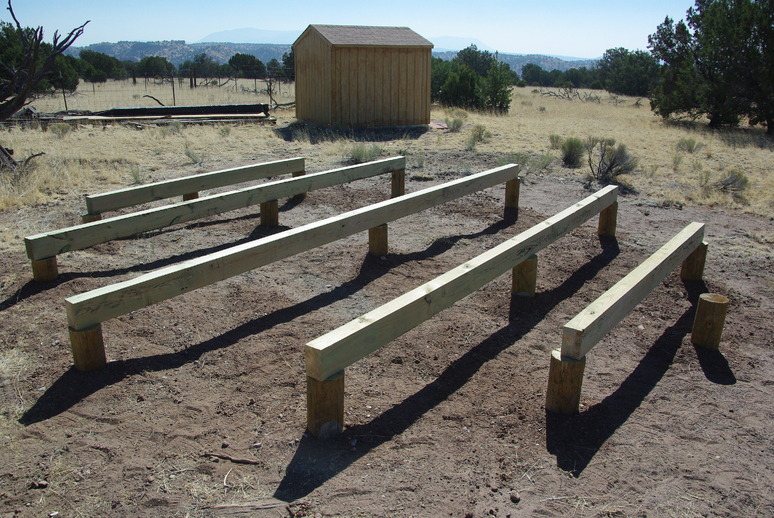
When the steel mounting plates arrive, they will screw the beams to the poles for a positive hold-down pressure. The next step is to cut the outer edge 2x6 boards which will support the ends of the 2x6 tongue and groove (T&G) which will be the actual floor. Notice in the above image, the two outer posts don’t have any beams. These will be bridged with 2x6 boards which will complete the outer support rim. Without this support the floor may cantilever off the ends. Because the yurt walls rest on the outer edge, there must be adequate support all around.
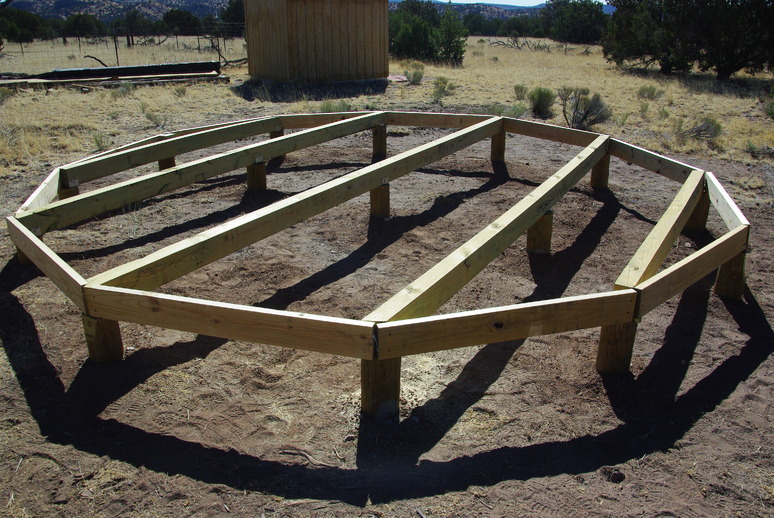
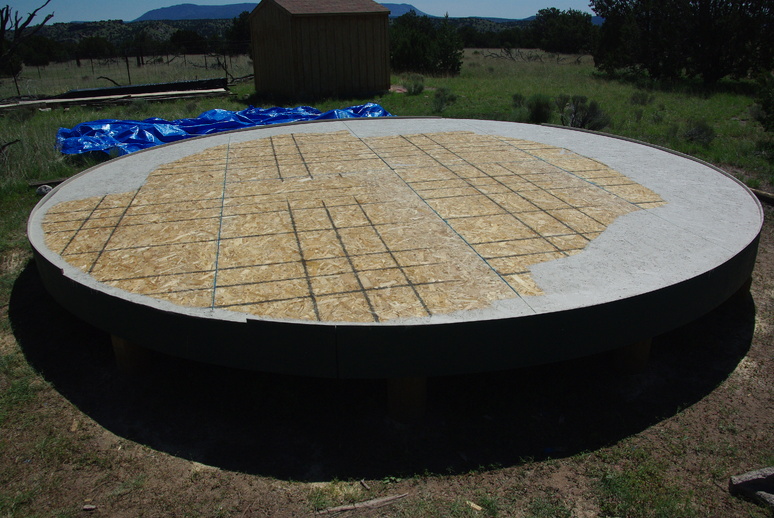
Now that the supports are all in place, the next step is the actual floor. As mentioned earlier, the floor will be of 2x6 T&G boards. Lots of T&G boards!
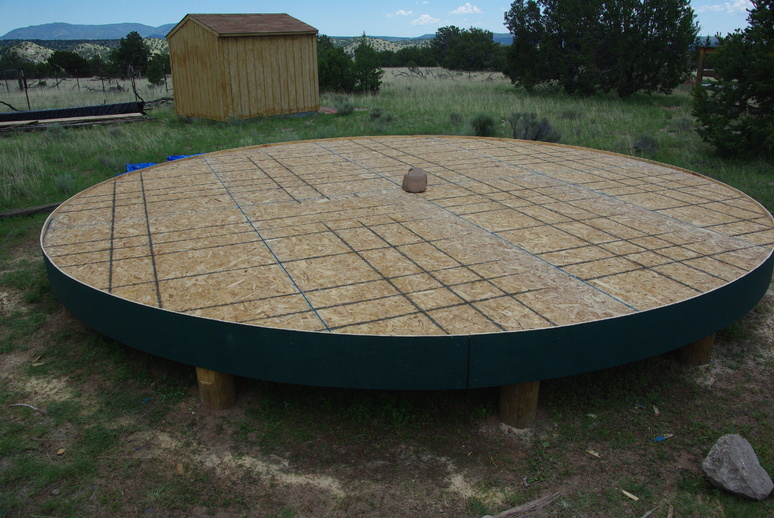
Sometimes, reality has a way of intruding into the “best laid plans of mice and men!” In this case, the price of lumber has been climbing up and down, mostly up! When I discovered the price of 2x6 T&G boards required would total over $1000, I then priced OSB 4x8’ T&G sheets and found I could save over $400, and install them easier and quicker. So that’s the route I went; and four hours later, I had a floor two layers thick of 23/32” sheets. That included the cutting of the 16’ diameter circumference.
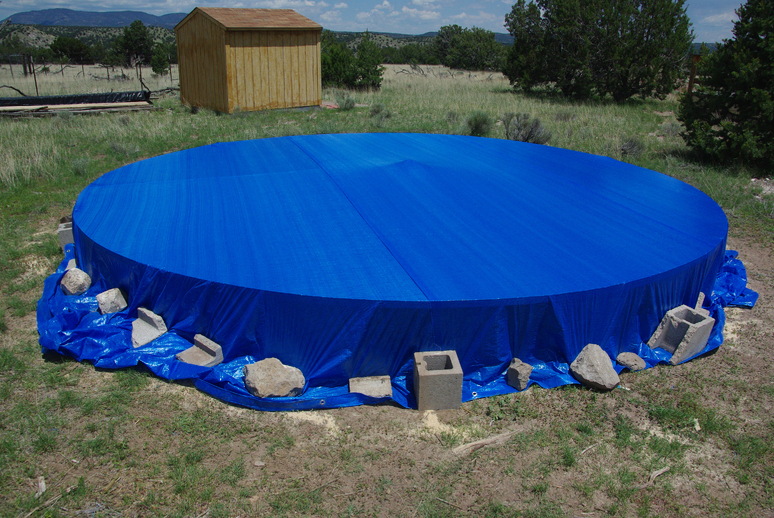
As the sky is doing its usual thing of afternoon heating and cloud buildup, I promptly covered the entire floor with a tarp. The lump in the center is a stone to provide (hopefully) better water runoff. The next step is installing additional screws where the edge is not tight, then installing the drip edge.
The original yurt drip edge was made using cement board. However, after ten years, I found the cement board was very brittle. Also, I noticed during the original installation, the board would crack slightly when bent around the circumference of the floor. So this time, I will use plywood sheets ripped into 8-inch strips. These will be mounted and curved around the perimeter and screwed into the edge of the floor, leaving 1” above the floor for the lattice walls to set next to. Obviously, this edge will require painting to protect it from the weather, perhaps the same color as the yurt walls.
After screwing down the floor all around the edge and installing the drip edge facia, we screwed additional blocks behind the drip edge joints at the bottom for more stability so the bottom would be secure also. We did find paint left over from the original construction of the yurts that matched the wall color, so we proceeded to paint the drip edge. Our next step will be to paint the floor, probally in a light tan color to make the interior brighter. It will also help protect the floor in case the tarp were to leak, until we can erect the yurt on the new floor.
Our next step will be to notch out the top of the drip edge where we wish the two doors located, 180 degrees across from each other. So we mark the center of the doors straight across from one door center to the other, using the floor center as a reference. This ensures the doors are exactly opposite each other. The door threshold width will be 43 7/8” for standard doors, and is measured striaght across, not around the drip edge curve.
Once that preparation is complete, we will start disassembling the yurt. Our first step is removing all the screws in the wall canvas bottom and removing the walls and insulation.

Then we will be able to access the snow load rafter supports, and remove them. Some of the boards are screwed to the lattice wall from the outside, so require wall cover removal first.
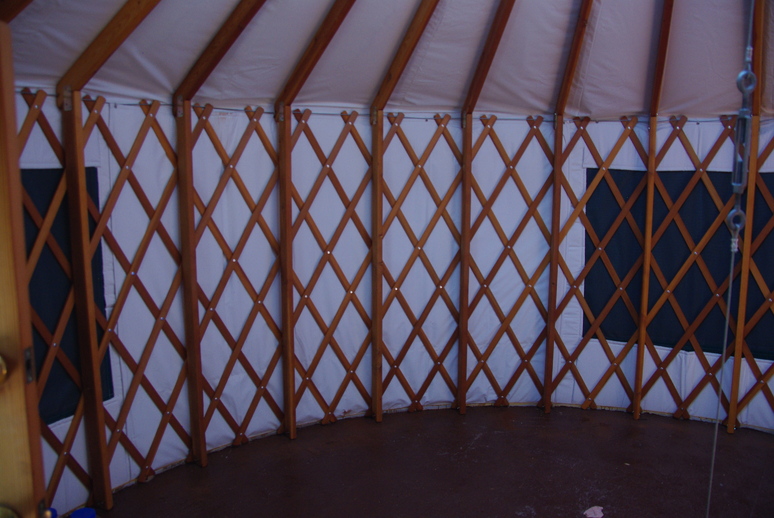
Once the boards are removed, we can remove the dome, followed by the top cover, insulation and fabric liner. The wall fabric liner is sewn to the insulation, but the top liner is separate.
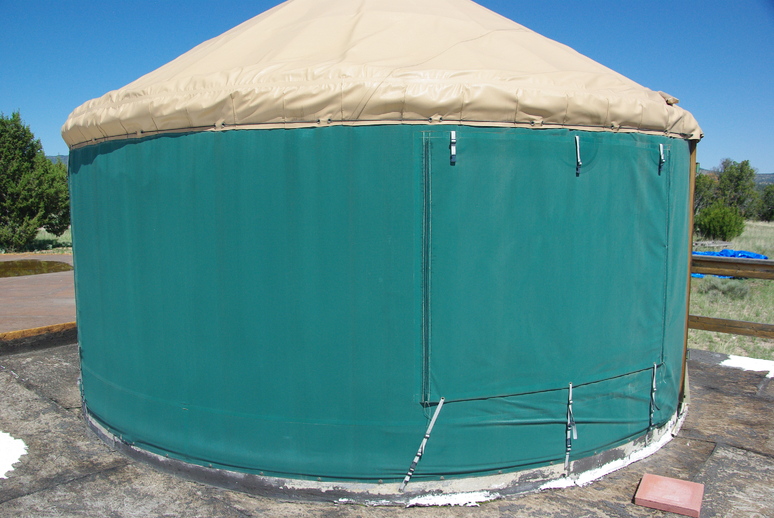
This is likely the last image of the yurt before we start moving it. And that’s enough for now. Stay tuned for part 3 of this saga coming soon! God Bless and stay safe!
Footnotes
Like the support poles, the beams are treated for ground contact.↩︎