Sunny Project
Today (Nov 20) we were greeted by a half-inch of snow! Yay, moisture! Second small snow event of this fall/winter season. Now, on to the subject of this post…
Some time ago, we built a large equipment shed for farm implements. In that shed, we also constructed a storage room. We added a battery and three small 15 watt solar panels to charge it.
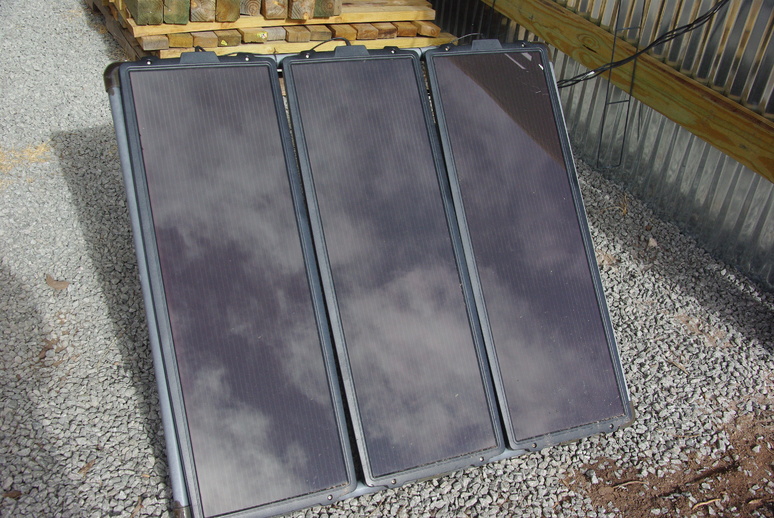
However, we soon discovered the 45 watt panel, shown above, was not really large enough to counteract the draw from the battery by the 120 VAC inverter. It was too much, and was only able to maintain the charge above cutoff for about a week. So, the only option was to install more solar capacity!
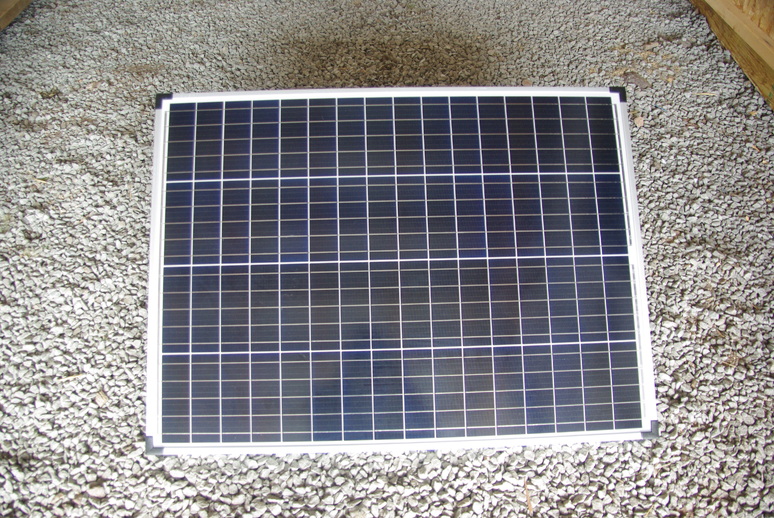
We acquired two 100 watt panels, which we will connect in parallel to give us a greater capacity to charge the battery. If we calculate as so,
\[ Current = \frac{wattage}{voltage} \quad = \quad \frac{200}{12} \quad = \quad 16.7 \ amperes\]
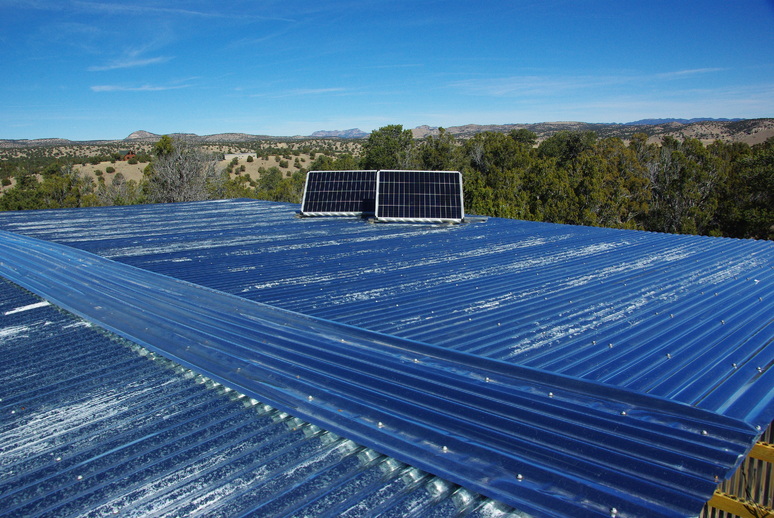
This of course, assumes full sun with panel maximum output. This rarely happens in real life, so we could derate that to something like 10 - 15 amperes charge available to the battery. To maximize this potential, we will mount them on the roof of the equipment shed so as to receive the longest sun time. We will orient the panels due south with an angle of about 34 degrees, which is the approximate latitude at our location.
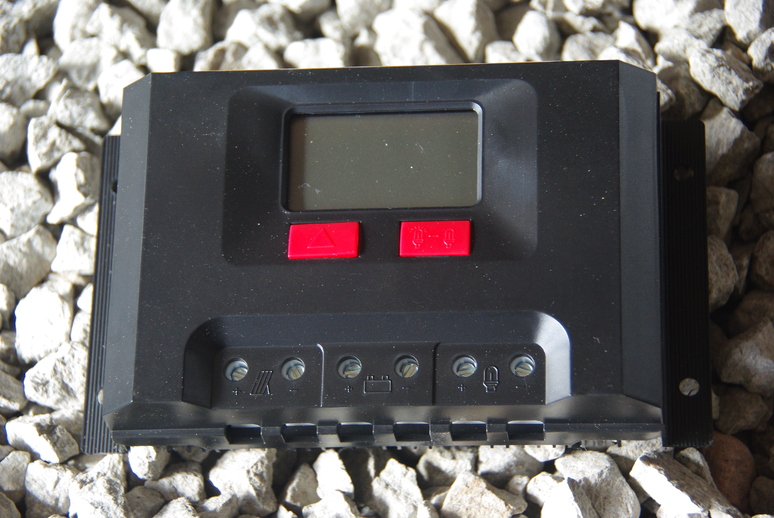
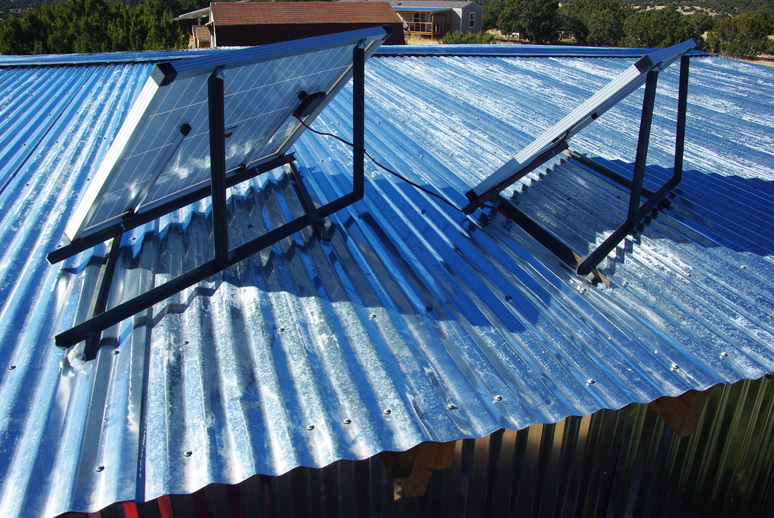
The 30 ampere charge controller, shown above, will regulate the input to the batteries. After we acquire some nuts and bolts, we will assemble the steel frames for the two solar panels. We want to ensure the lag screws hit the rafters for a solid mount to maximize wind resistance, so we will most likely have to build the brackets a piece at a time, especially the base. Then we will attempt to weld the other frame pieces onto the mounted base angle iron. Custom construction indeed!
Hopefully, Lord Willing, we can use the tractor forks, with the platform in place, to support the wire-feed welder at the roofline, and plug it into the inverter for power. Then we can weld the remaining support brackets to give us the exact angle necessary for average year-round sun exposure.

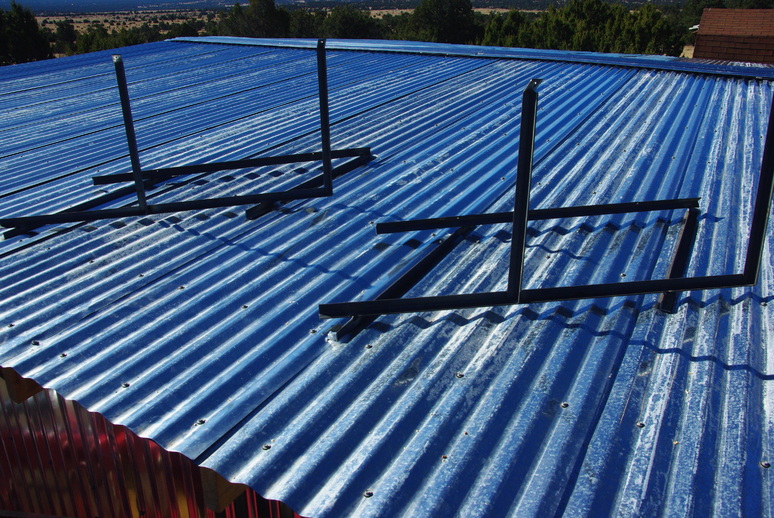
The above brackets, already drilled for assembly, will be installed on the roof. Three-inch lag screws will fasten the base brackets (the medium 1” angle iron) to the rafters, with silicone caulking between for a waterproof join. Then the shorter bent brackets will bolt to the upper side of the solar panels, and the longer angle irons to the bottom. Then comes the welder to join the loose pieces together.
Surprise! The inverter will not handle the required AC input the wire-feed welder requires! The battery is not an issue, as it supplies 200 amperes, which would be 20 amperes available at 120 VAC. The welder can draw almost 20 amperes at the highest setting, but I am not using the highest setting. So, I was forced to bring all the brackets back to the workshop to weld them there. Not a huge issue, but I was a bit disappointed. Moving right along…

The brackets are now welded and ready to go onto the roof. Although they look a bit weird, they are angled to point mostly south at a vertical angle of 34 degrees, the best compromise for all year sun. As mentioned earlier, I used 1/4” lag screws to screw the brackets into the rafters beneath the tin. Then silicone sealant was used to cover the screw heads and in the joints between the brackets and tin.
I had to remove the panels from the brackets to access the holes for the lag screws. That required some contortion exercises to reinstall the panel mounting bolts, but hey, exercise is good!
So, after remounting the solar panels, I drilled a hole to feed the wires inside through a 1/2” grommet. I covered that with silicone sealant also. I could have routed the wires over the roof edge, but that was messy and prone to damage.
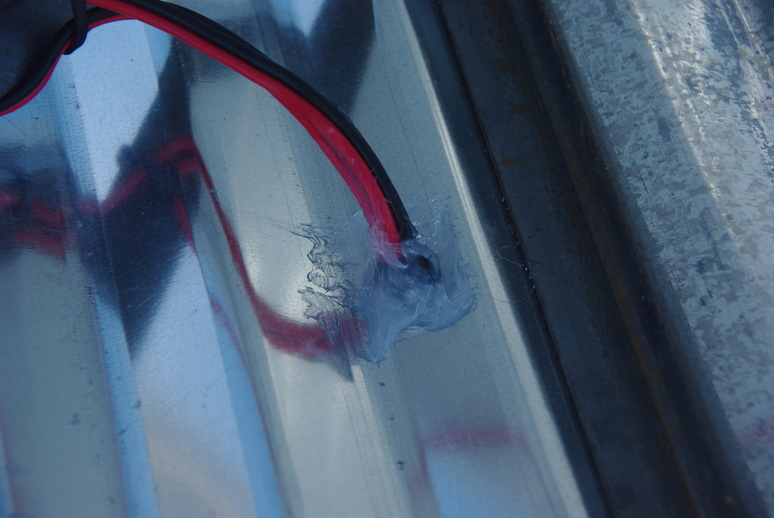
The wires look much neater and there is less exposure to the elements. After connecting the charge controller between the battery and panels, the panels, wired in parallel, were supplying 15 amperes to the battery. Another little job finished!
So, once again we are at the end of this post. Have a great Happy Thanksgiving (tomorrow)! We thank God for all we have, for without His Grace, we would have nothing!