Pico Portable Weather Station
As I mentioned in an earlier post, I intended to make something portable. I have now completed the project to design a portable weather station using the Pico board, the BME280 sensor, and a OLED display. This post describes the box I designed to contain all the important parts.
To design something like this, I prefer using OpenSCAD, a really nice 3D CAD program that runs great on Linux and is fairly easy to use. OpenSCAD uses text commands to describe each block, which it then renders in 3D. To realize a finished product, I then export it as a .stl file. For the 3D printer, I use Ultimaker Cura, which takes the .stl file, slices it, then saves it as a *.gcode file suitable for the 3D printer.
My 3D printer is the Monoprice Maker Select Plus 3D Printer, reviewed here, a rather old 3D printer by today’s standards, but it works great and has the capability to print a project with a volume of 200 x 200 x 180 mm. It has a single extrusion printhead with a resolution of 0.4mm. What’s nice is it is totally self-contained, although it can be run directly from a computer, which I never did see as being very practical, as it ties up the computer for the entire print time. Surprisingly, I found in a casual search, several places still have this particular model for sale.
I primarily use PLA (Polylactic acid) filament as it is easy to work with, has a low melting point, and is relatively inexpensive. The printer can also use ABS (Acetonitrile Butadiene Styrene), but I don’t use that as the vapors can be annoying. PETG (Glycol-modified Polyethylene Terephthalate) and NYLON can also be used. This website has a really good writeup explaining the different filament types and properties.
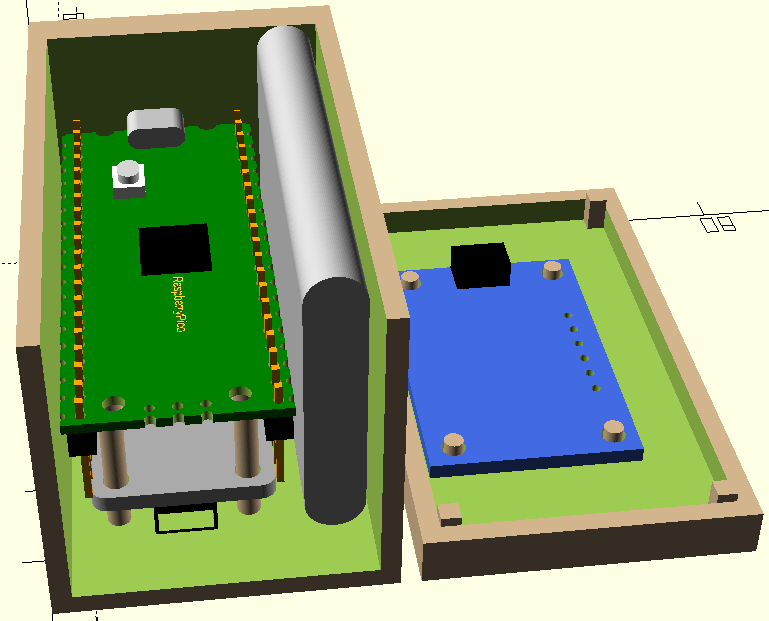
What I wanted my box to contain was the Pico board w/header pins,1 the BME280 sensor board and the OLED display. I designed the box where the lid contains the 128x32 display. I tried using a 128x64 display, but the board was large and required a complete redesign of the box, which made it too bulky.
At the bottom of the above image is the BME280 sensor facing downward. Holes are placed in the bottom of the box for atmosphere ingress. Also mounted to the underside of the Pico board was the LiPo shim mentioned here, and seen in the below image. The box was made a bit wider to enclose the battery.2 As the battery is about the same length as the Pico board, it worked out nicely. Notice the small pushbutton on the front of the LiPo shim used to provide power to the Pico, sensors and display. By plugging the micro-USB cable into the Pico jack (seen atop the Pico board), the board can be placed in mass storage mode by simply holding down the BOOTSEL botton on the Pico, then pressing the LiPo power button twice. No cable connecting/disconnecting required.
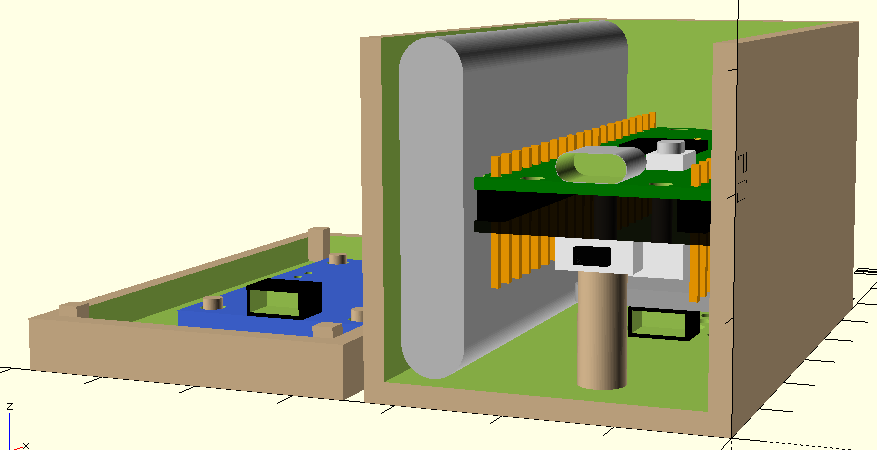
Notice the thick column directly below the LiPo switch for support. As my printer is set to provide support for holes, I accidentally broke an earlier spindly column I had while removing the infill. The next image shows the case ready for printing. At the image top are the two holes for LiPo button and micro-USB access. The lower portion shows the air holes and support posts for the Pico board. The support posts also position the sensor upside down in the bottom of the case. Care is needed when pressing the sensor onto the posts, as they will break if too much lateral pressure is exerted.
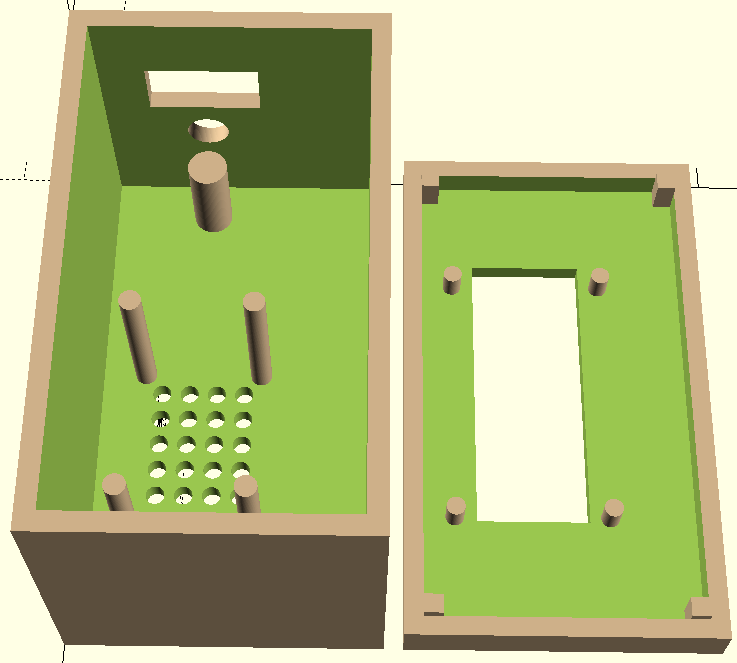
The lid’s support posts are for the OLED display. Note the blocks in each corner of the lid which aligns the lid with the box and holds it in place. The lid is not glued or screwed as the lid must be removed for further programming of the Pico. The internal connections between components were made using STEMMA QT/Qwiic jumper cables, but are not shown here.

The finished box, although rough, works just fine. If finishing were desired, acetone can be used for that, and can make a really nice smooth box. What I leave out of this is that the creation of the individual components are necessary for precise placement of the box’s features, and to ensure everything fits as they should and are in the right position. Plus, these components may be reused in other design projects to check fitment.
That’s it for this post. Have a great day in the Lord Jesus! If you are not right with God, get right, through His Son Jesus! If you don’t believe in Jesus, what if you’re wrong? Are you willing to bet your soul?