Rpi 4 PWM - Part 2
As we continue from Part 1, where the Python PWM program was designed to run in a terminal window, I also want to have a version that will run from the graphical user interface (GUI). It is more convenient and more up to date with normal usage. Plus, I like to have the convenience of just clicking on a link/icon from the normal Desktop than have to select the file from a directory listing; or, navigate via a terminal window or command line interface (CLI) to the Python directory, then have to type in the name of the program. So, a nice neat graphic window is the thing.
BTW, running from the CLI is handy if you wish to check your code in various versions of Python. For example, the code in Part 1 of this post gets heartburn when attempting to run under Python 2 (2.7, etc.) The line: dc = input(“Recommend 0-25%, Value (%):”).strip() gives an error in Python 2 because of the “.strip()” at the end. Whereas in Python 3 the functionality is OK.
So, back to the main subject. Having a graphic window is easier to play with. With that in mind, let’s get into the program to construct a window and have everything self contained. For example, the line:
import tkinter as tk
imports the tools (Tkinter, short for TK Interface) to construct a container for the program to run our functions. What’s more convenient is Tkinter is already installed on the Raspbian Buster for the Pi 4.
However, if you find your Pi does not seem to have it installed, just do:
sudo apt install python-tk
An example to create a container for our purposes could be like the below code.
#!/usr/bin/env python3
#experiment with removing windows or containers

import tkinter as tk
root = tk.Tk()

class MyApp:
    def __init__(self, parent):
        self.myParent = parent
        self.myContainer1 = tk.Frame(parent)
        self.myContainer1.grid()


        self.button1 = tk.Button(self.myContainer1, text="OK", command=self.button1Click)
        self.button2 = tk.Button(self.myContainer1,activebackground = "red", background = "pink", text="Quit", command=self.button2Click)

        self.button1.grid(row=1)
        self.button2.grid(row=1, column=1)

    def button1Click(self):
        if self.button1["background"] == "green":
            self.button1.config(activebackground = "yellow", background = "yellow")
        else:
            self.button1.config(activebackground = "green", background = "green")

    def button2Click(self):
        self.myParent.destroy() # destroy frame myContainer1

# main loop
todo = MyApp(root)
root.mainloop()
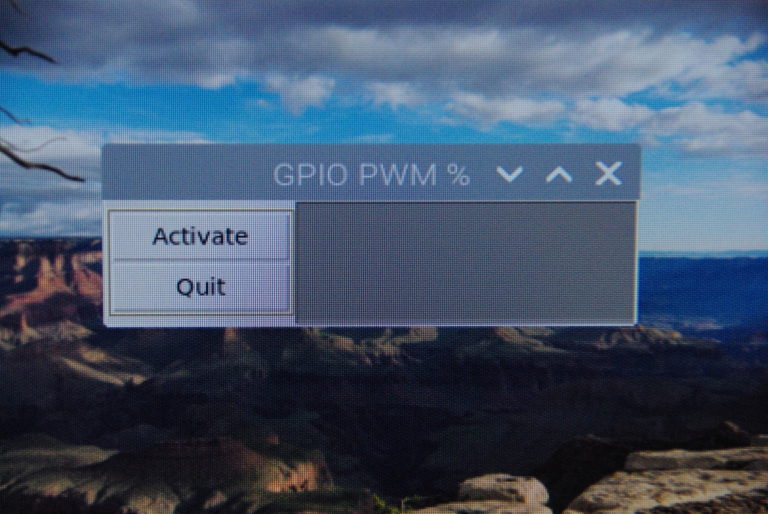
This little snippet of code will create a simple window with two buttons as shown below.

What we need is pretty simple. A container, a method to display a couple of buttons, a way of accepting input from the keyboard, and a display to show that input. Also, the function to activate the GPIO PWM output.
I’m not going to delve into a lot of detail on the program construction as there are many places on the Internet that can do a better job. But, I will say that of all the geometry managers such as Placer, Packer, and Grid, I prefer the Grid for positioning the widgets in the top level window. I will leave it to the reader to research and learn the finer points of Tkinter. Suffice it to say that the process is to create the top level window, then two container windows inside that window, one for buttons and one for the program input/output.
# set title
        self.myParent.title("GPIO PWM %") # set window title
        self.myParent.geometry('300x76')  # set window size

        # Make topmost container with everything else inside
        self.myContainer1 = tk.Frame(parent) # topmost frame: myContainer1
        self.myContainer1.grid()
# two more containers, left one for menu buttons, right one for data, horizontal layout.
        # left frame inside myContainer1
        self.left_frame = tk.Frame(self.myContainer1, background="tan",
                    borderwidth=2, relief=tk.RIDGE,
                    height=76, width=50)
        self.left_frame.grid(row=0)

        # right frame inside myContainer1
        self.right_frame = tk.Frame(self.myContainer1, background="gray",
                    borderwidth=2, relief=tk.RIDGE,
                    height=76, width=250)
        self.right_frame.grid(row=0, column=1)
Once we create the required windows, we need to tell the program where to place things (using Grid).
# add buttons for menu selection to left_frame
        self.button1 = tk.Button(self.left_frame, text='Activate', command=self.set_percent)
        self.button1.configure(width=button_width, padx=button_padx, pady=button_pady)
        self.button4 = tk.Button(self.left_frame, text='Quit', command=self.button4Click)
        self.button4.configure(width=button_width, padx=button_padx, pady=button_pady)

        self.button1.grid()
        self.button4.grid()
Please note the code listing will wrap long lines because of the webpage width, so you may have to “unwrap” it to get it to run correctly. If Python gives you indentation errors, that is most likely the cause. Anyway, if you look at the button1 code you will notice it selects a function called “set_percent” which in turn calls a “NewFrame” function. It’s not really necessary for this program, but really handy if you have multiple windows placed into the same frame to clean up the previous frame’s contents.
    def NewFrame(self, color): # new 'right_frame' inside myContainer1. Use 'color' for background
        self.right_frame.destroy() # delete old frame before creating new one
        self.right_frame = tk.Frame(self.myContainer1, background=color,
                    borderwidth=2, relief=tk.RIDGE,
                    height=120, width=250, padx='5m')
        self.right_frame.grid(row=0, column=1)
One last piece is the “center window” routine that determines the size of your display and centers the window. Otherwise it usually ends up in the upper left corner of the display, probably not the best place unless it were a large window.
This snippet does that:
def centerWindow(): # open the Tkinter window in center of screen
    w = 300 # width for the Tk root
    h = 76 # height for the Tk root

    # get screen width and height
    ws = root.winfo_screenwidth() # screen width/2 (dual screens)
    hs = root.winfo_screenheight() # height of the screen

    # calculate x and y coordinates for the Tk root window
    x = ((ws/2) - (w/2))
    y = (hs/2) - (h/2)

    # set the dimensions of the screen
    # and where it is placed
    root.geometry('%dx%d+%d+%d' % (w, h, x, y))
Many of the names I use here are arbitrary and could be named whatever is convenient for you. Python doesn’t care unless you are calling a specific library function. Anyway, after all that, I now place the entire program for GPIO PWM control. This is a software PWM, not hardware PWM. All this has been gleaned from the Internet and edited for my purpose here. I am not a guru on Python, but I can modify all day long. :)
All said and done, you should get a window that looks like this.
Pressing the “Activate” button will place the cursor in the input window, waiting for your input. On <RETURN>, the program shows your input in the area below and starts the PWM output to your circuit. This particular program uses GPIO18 (physical pin 12) on the 40-pin socket.
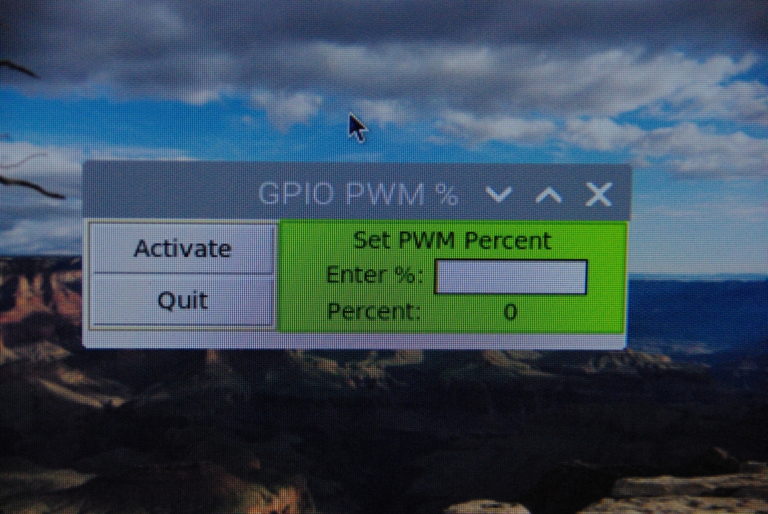
Input limits are 0-100%. An input of 21% gives around 0.7 V average output. The maximum of course is 3.3 volts at 100%. Pressing the “Quit” button shuts off the output and exits the window.
Hope you have as much fun playing with this program and the Raspberry Pi 4 as I have. Modify to your desires, break it, then fix it. learn…
To view the listing or to download directly, right click on this link: Program Listing
To make it even more convenient to access, you could create a desktop file to allow selection from your main Raspberry menu. Just create a small file in /home/pi/.local/share/applications. Call it whatever you wish, like “GPIO_PWM.desktop” for example. The contents example might look like this and would appear in the main menu under “Education”:
[Desktop Entry]
Version=1.0
Name=GPIO PWM
Comment=Access the Pi GPIO pin12
Terminal=false
Type=Application
Icon=
Categories=Education;
Exec=python3 /home/pi/Python/PWM_V_Control.py
I thank God for all things, including the toys used here. Have a great Day!