Code
find -name board*Pico de gallo translates from Spanish as the phrase “rooster’s beak.” The main ingredients of pico de gallo are tomatos, onions and peppers, usually fairly hot ones like jalapeños. Additional ingredients can include lime juice, cilantro, bell peppers, avocado, or garlic. The ingredients can be very healthy as onions are an excellent source of vitamin C and fiber. Tomatoes have anti-oxidant properties and are high in vitamin C and lutein. Chiles contain vitamins C, A, and B complexes, and also a healthy amount of iron, potassium, and magnesium. As long as one does not add too much salt to it, one has both a flavorful and healthful, low calorie topping or relish. Pico de gallo differs from other Mexican salsas because the ingredients are finely chopped yet not liquid.
But, that’s not what this post is about. The PICO I am referring to is made by Raspberry Pi in the UK. It is a tiny microcontroller designed by the same folks that brought us the Raspberry Pi boards, Zero boards, etc. This particular microcontroller (the RP2040) was designed by them, perhaps in response to supply issues because of the recent Covid-19 pandemic that has caused the Pi 4 to be in scarce supply, and certain scalpers to price existing stock three or four times what they are sold by raspberrypi.com. Fortunately, there is light on the horizon, as these supply issues are beginning to bounce back to normal in the near future, so I have read.
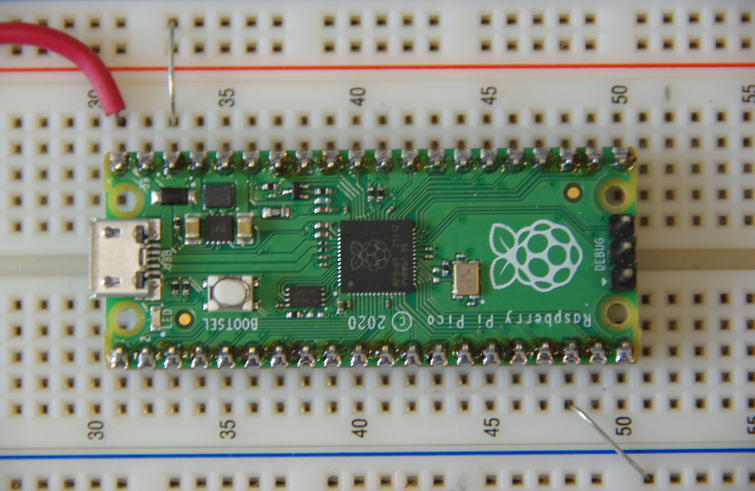
Currently, these are priced at $4 a board, which is very reasonable, given the specifications of the controller and carrier board. These are the specifications as listed on the Pico Documentation Website.

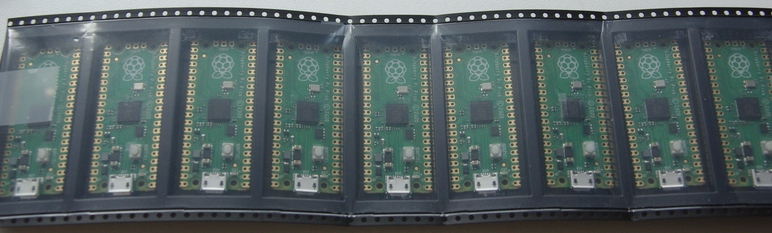
There is a script that will set up the C++/SDK on your Raspberry Pi 4 and possibly previous versions. I don’t know for sure as I only have Pi 4s running the new 64-bit Raspbian OS. Since the Pico is so reasonably priced, I couldn’t resist getting a few for future projects.
It is also a good idea, unless your design is to be surface-mounted, to get the header strips. They are also available on the same website. Great for plugging into your breadboard. The website has all the documentation you may need to get started, both for the Pico and the Pimoroni Tiny2040 board as well
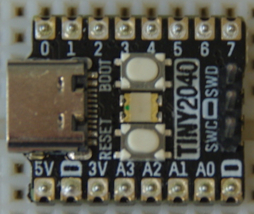
Speaking of the Tiny2040, it is a postage stamp sized version of the Pico. And, most importantly, has four times the flash memory as the Pico. It also has a USB-C connector instead of the micro-USB connector of the Pico. So, if you wish to play with both, you will need two cables, or a micro to C adapter. But that’s a minor issue compared to the fun of playing with these two versions of the RP2040 microcontroller. BTW, the Pi 4 power connector is also a USB-C connector.
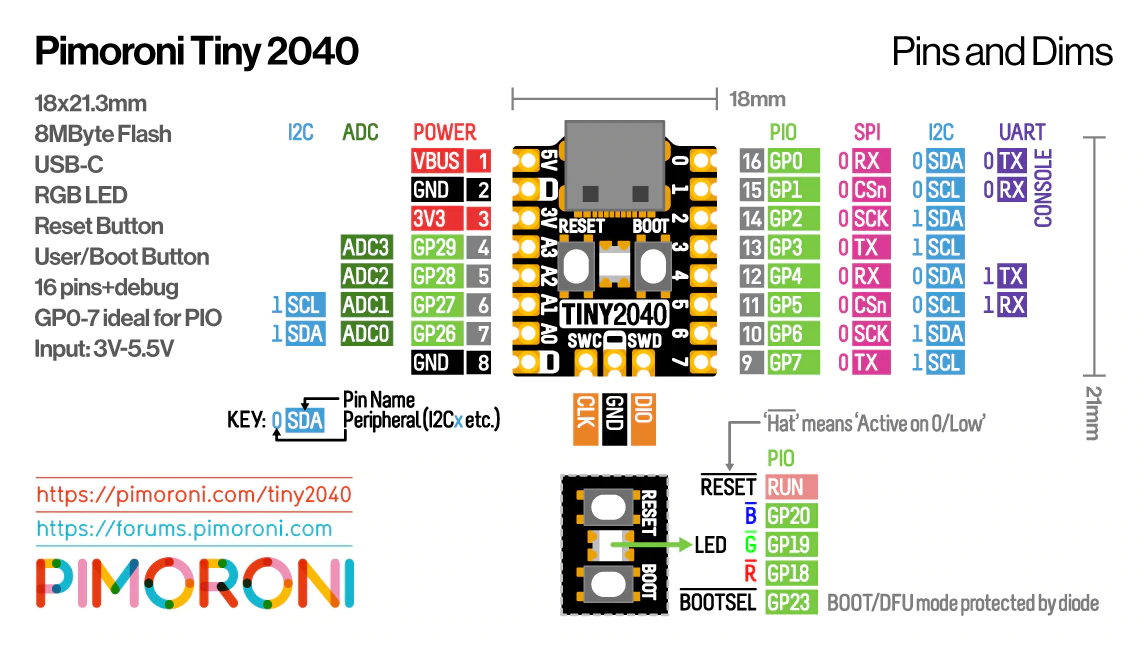
What’s nice also is the three color LED mounted between the RESET and BOOTSEL buttons. Makes a great lightshow as it can be driven with PWM to vary the brightness and mix the colors. The brightest appears to be the green color, but that could seem so because the human eye responds more to that particular hue than the others. Also, notice it works on active low, instead of the usual active high.
The pico-examples that come with the pico script work as well for the Tiny2040, with a few changes. The cmake .txt files were modified to replace all references to the pico-examples directory with tiny2040 as I copied them into their own directory. Then cmake can be used with the -DPICO_BOARD=pimoroni_tiny2040 switch. You can also place in your .bashrc file, lines such as export PICO_BOARD=pimoroni_tiny2040; or, for the Pico, export PICO_BOARD=pico, depending where your main interest lies.
There is a file called flash_nuke available at https://datasheets.raspberrypi.com/soft/flash_nuke.uf2 to erase all the flash memory, except the BOOTSEL mode as it is safely in ROM inside the RP2040 chip.
To load any program on the boards, it is easiest to drag-and-drop your .uf2 file onto the dirctory that is the board. To place the Pico or Tiny2040 into flash memory mode, hold down the BOOTSEL button while plugging the USB connector into it. It will show in your directory listing as a flash drive, ready for programming. After your program.uf2 file is transfered, the board will reboot, disappear from your directory listing and run your program. Simple and easy as the cmake program generates all necessary files.
The above mentioned -D switch for cmake should allow the blink.c program to successfully run on the Tiny2040 without modification. However, it will only light the green part of the LED. What I did, since I duplicated the pico examples into another Tiny2040 directory, was modify the blink.c to sequentially blink all three colors. Perusing the boards file in the pico-sdk directory of your SDK installation will identify pin names for the three pins mapped to the LED. I forget the exact path, but the command below will find it. From the pico-sdk directory, type,
find -name board*Edit the blink.c file in the pico-examples/blink directory. Re-compiling the blink.c file can be done in the pico-examples/build/blink directory with make. It is not necessary to run cmake again from the pico-examples/build directory, unless you have lots of time on your hands, as it takes a while, and regurgitates all the example files. After editing the blink.c file, run make from the build/blink folder to recompile.
/* Modified blink.c file for Tiny2040 microcontroller */
#include "pico/stdlib.h"

int main() {
    const uint LED_R = TINY2040_LED_R_PIN;
    const uint LED_G = TINY2040_LED_G_PIN;
    const uint LED_B = TINY2040_LED_B_PIN;
    int time = 125;
    gpio_init(LED_G);
    gpio_set_dir(LED_G, GPIO_OUT);
    gpio_init(LED_R);
    gpio_set_dir(LED_R, GPIO_OUT);
    gpio_init(LED_B);
    gpio_set_dir(LED_B, GPIO_OUT);
    while (true) {
        gpio_put(LED_R, 0);
        sleep_ms(time);
        gpio_put(LED_R, 1);
        sleep_ms(time);
        gpio_put(LED_G, 0);
        sleep_ms(time);
        gpio_put(LED_G, 1);
        sleep_ms(time);
        gpio_put(LED_B, 0);
        sleep_ms(time);
        gpio_put(LED_B, 1);
        sleep_ms(time);
    }
}
The above blinks the 3-color LED on the Tiny2040 board. I used time variable to easily set the delay. As mentioned above, I edit the example blink.c file in the top Tiny2040/blink directory, but re-compile using make from the Tiny2040/build/blink directory. The examples and online documentation cover much more than the tiny bit I’ve mentioned here and is worth downloading.
Have a great day in the Lord Jesus, and if you don’t know Him as your Lord and Savior, there’s no time like the present. Time is running out, don’t wait! God Bless!