DJI Mini 3 Video Manipulations
Today I thought I might dip into the video editing aspect of videos from the DJI Mini 3 Drone. Several types of data can be recorded when using the drone. Of course the flying video itself; single shots, either Quick Shots or single photos, and last but not least, the flight telemetry from the flight(s).
The flight telemetry is especially useful if one wishes to see things like flight distance, flight height, battery usage, available satellites, recording time, and other variables taken during a flight. To get all this information available post-flight, we first must find the data on the drone or controller. The actual flight video(s) and data can be retrieved several ways.
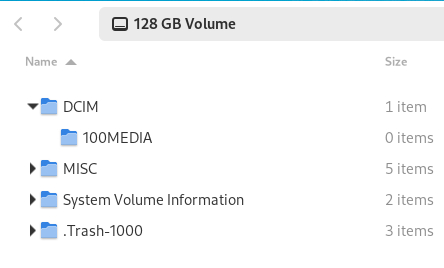
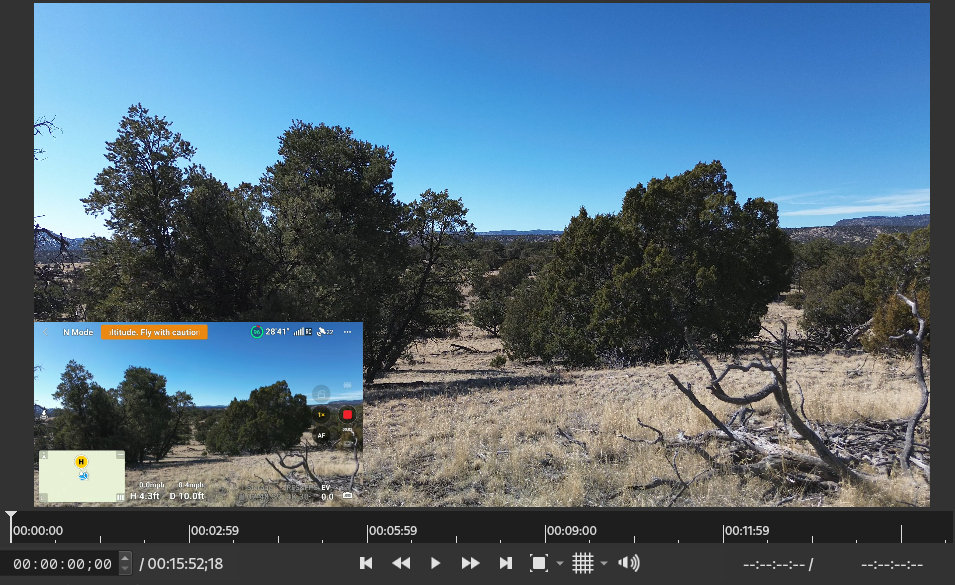
For this post, we will use the simplest method, requiring no external programs. And that is simply placing the drone’s MicroSD card into a computer USB slot to download the video to the host computer. The flight video is saved in the 100Media folder as shown above.
For the results I prefer, I record in 4K at 30 frames per second (FPS). A more cinematic outcome can be achieved by reducing the frame rate to 24 frames per second during recording. In my case, I prefer the greater detail of 30 FPS.
For recording the telemetry, we must do some things before a flight. On the RC controller, after everything is powered on and connected, stroke down twice from the top of the screen. This gives a menu with various connection options. The button we wish to select is the Record Screen button. This starts recording screen telemetry onto the controller’s MicroSD card. Stroking once upward returns to the main drone video screen display. Reversing the above steps when finished turns off the screen recording.
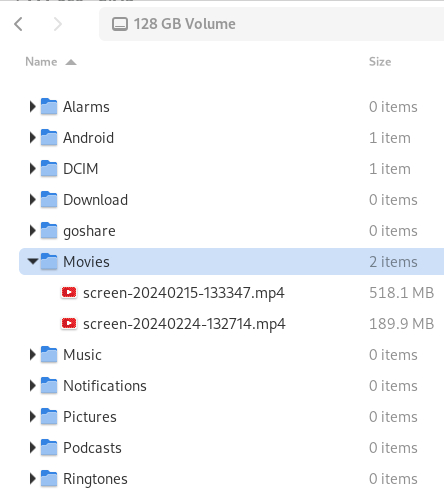
After removing the RC controller’s MicroSD card and placing in the host computer, we find the screen recordings stored in the above location. There are other options to transfer videos from the drone, but this requires additional DJI packages be downloaded and installed, either on the host computer or perhaps to a smartphone.
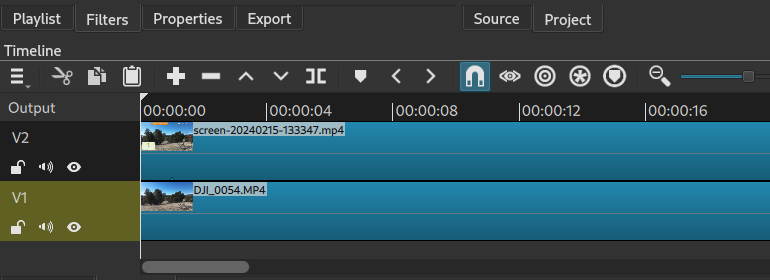
Next, we get into making a simple video using the 4K recorded flight video and the telemetry. For this effort we will make a picture-in-picture rendering using the ShotCut video editing software package. After saving the two recordings to some host computer location, we then load ShotCut, where we can now drag-and-drop the two files into the Playlist tab. After those have loaded, we have several options for dragging the files into the Timeline, which in my setup is the bottom portion of the ShotCut window. Here, it is important which file is placed where. The simplest approach I find is dragging the main flight video first, which creates timeline V1, the background video. Next, we click on the timeline menu (3 bars), select Track Operations, and Add Video Track. We then drag the telemetry video to that track.1
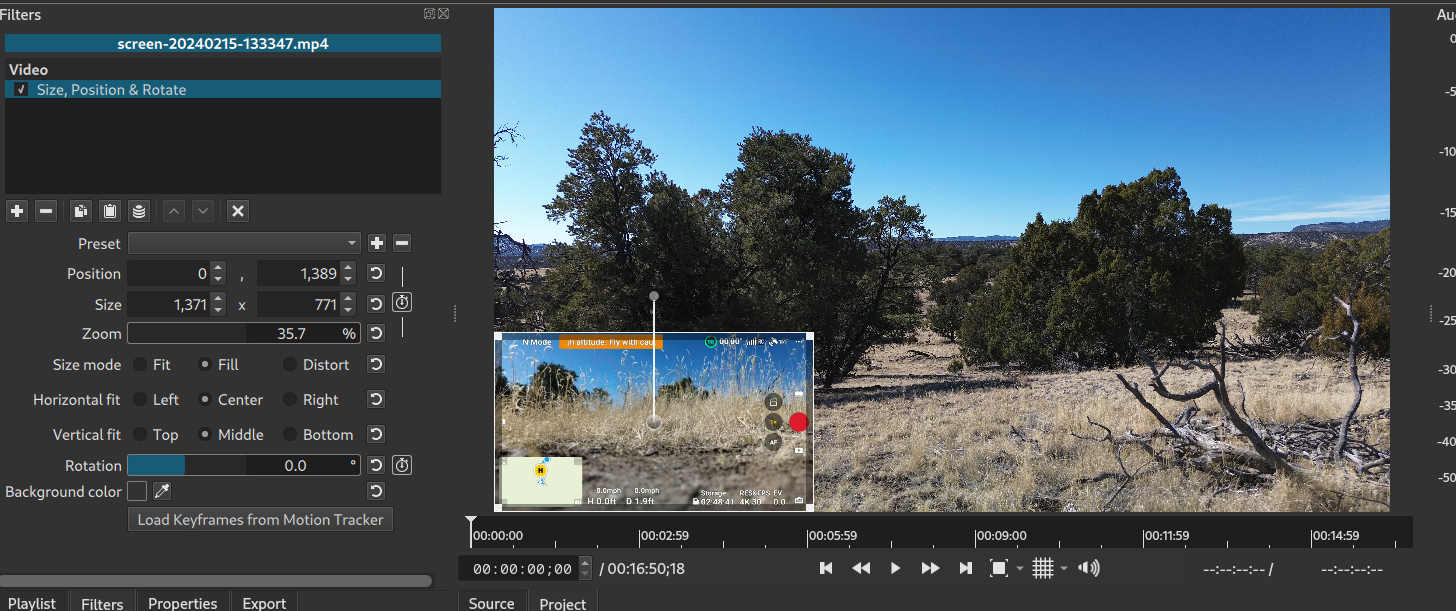
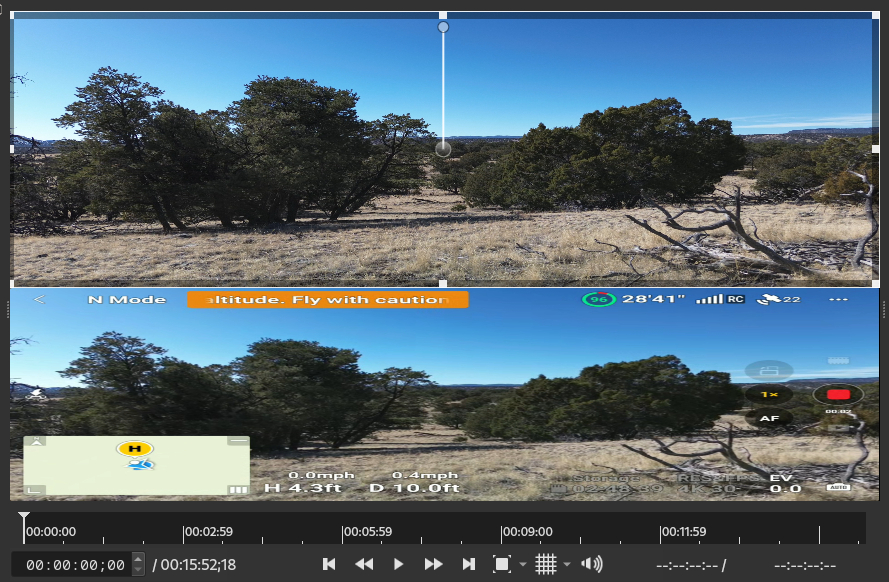
Notice the second video obscures the first, so now we wish to shrink the second video to a corner. We do this by adding a filter. First select (click on) the second video in the timeline window,2 then select the Filters tab, find and select the Size, Position & Rotate filter. Notice the video now has small squares or handles at each corner. Let’s grab the upper right corner and drag to position the video in the lower left, leaving us with the setup depicted below.
We now note the images don’t line up, time-wise. In this particular case, the telemetry video recording was started before the drone’s video recording. We can now drag the timeline pointer to where we want to start. Notice the stick/branch on the right side of the main video, which we will use to align the two timelines. By manipulating the timeline pointer, we find the same point in the small window.3 We now have the small window (V2 track) where the branch is at the right side of the window. Now we cut the V2 track at that point by pressing S, or selecting the cut (][) icon. Make sure the V2 track is selected before cutting. After cutting, select the first portion of the V2 track, and delete. Then right click on the empty timeline portion and select Ripple Delete. Pressing Home to move the timeline pointer should now show the two timelines (and videos) aligned. Minor adjustments may be necessary for more accurate alignment, using the same procedure.
Either video in the two timelines can be dragged for closer alignment. By adding a filter to the main video, it too can be resized and moved in the same manner if, for example, you wished them side by side, or one atop the other as shown below.
As the DJI Mini 3 Drone records by default in 4k HDR, we wish our new video be rendered likewise. To do this, we select the Export tab which gives a list of preset formats for videos. There are many options that can be selected and modified, including some combinations that will not work. So, I prefer the H.264 High Profile preset option, but I then select the Advanced tab where I can choose the Codec I prefer for the 4k videos. Firstly, select the Codec tab, and then the Codec drop-down menu to find the libvpx-vp9 codec. This gives excellent results, but does take longer to render. Selecting the Export File tab to save the rendered file then starts the process of rendering.
And that’s about it, in a very brief nutshell. I have likely skipped some more-obvious steps in between, hopefully without falling into the trap of, “Everyone already knows that!” If I have, that’s on me!
Have a great day, and may God Bless your efforts and keep you and your family safe. I pray you know Jesus as your Lord and Savior. If not seek His Will for your life. Be surprised how your life will change! Don’t wait!